Friday, August 19, 2016

Aquaman Cosplay Progress: Building the Trident - Part 1

Aquaman Cosplay Progress: Building the Trident - Part 1

For Halloween, I have decided to go as a female version of Aquaman  (the Jason Mamoa version). So, I've put my Ariel Gown project on hold for another fishy friend.


I liked the look of  Raquel Sparrow's cosplay version that was shown on GeekTyrant several months ago and I am using her outfit as an inspiration.


I am starting out by making the trident. Normally, I try to be accurate in my cosplay outfits, but the movie version of the trident isn't doing it for me. I much prefer the New 52 trident.


Because I am going to be putting a good chunk of time into it, I am going with the version I like.

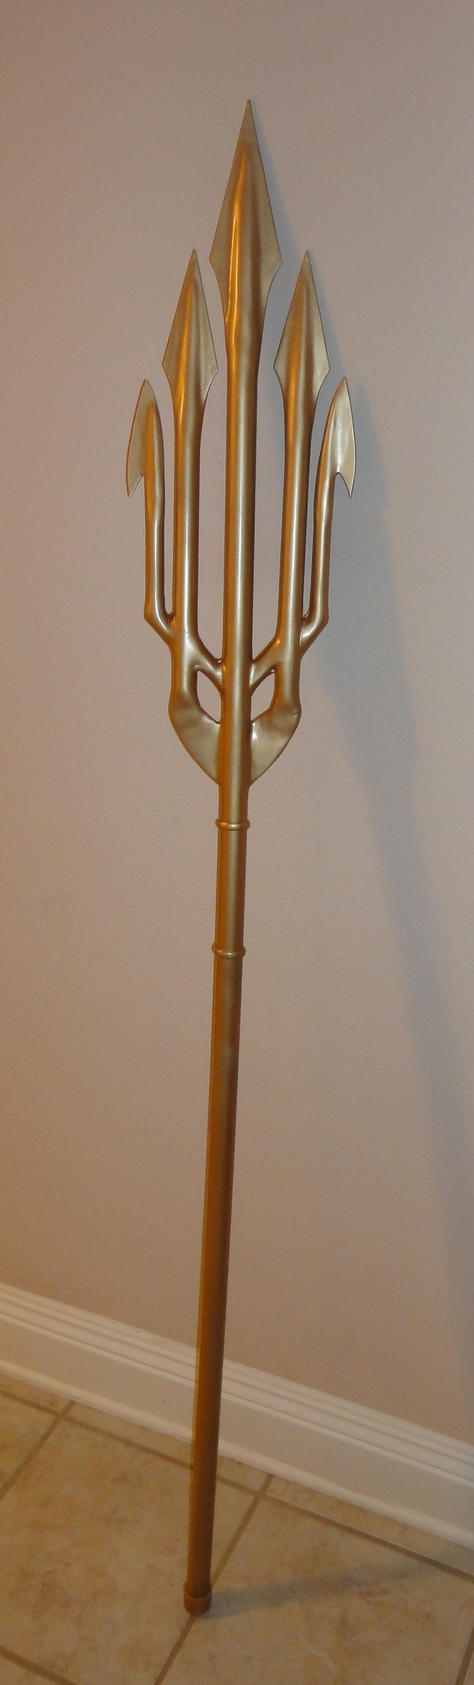

I found this trident on Snuggle Mouse's Deviant Art page and I am using it as inspiration for my build.

The Build - Part 1

This is the first chunk of my trident build. I have made a good chunk of progress, but it is slow going. Once I have made another chunk of progress then I will add make another posting.

I wanted to make my trident as light as possible because I was going to have to carry it around all day and didn't want to eventually grow to hate it. So, I decided to use plastic dowel rods instead of wood like I have seen in other trident tutorials. I got three packs of dowel rods from Hobby Lobby. They cost about 3 bucks per package so overall it was pretty cheap.


I started by generally creating a layout of how I wanted my trident to look with the dowels.


Because I wanted the middle rod to be longer than the 12.5ish inches of the dowels, I created an extension by using cutting another dowel into a small piece.


I then used flat wire (also purchased at Hobby Lobby) and hot glue to build support for the extension while attaching it. I didn't want it falling off on me.


And there you have a bigger stick!

From there, I went off to construct the joints of trident. 


I cut the joint pieces at a 45 degree angle so they could be flat against the trident spikes. 
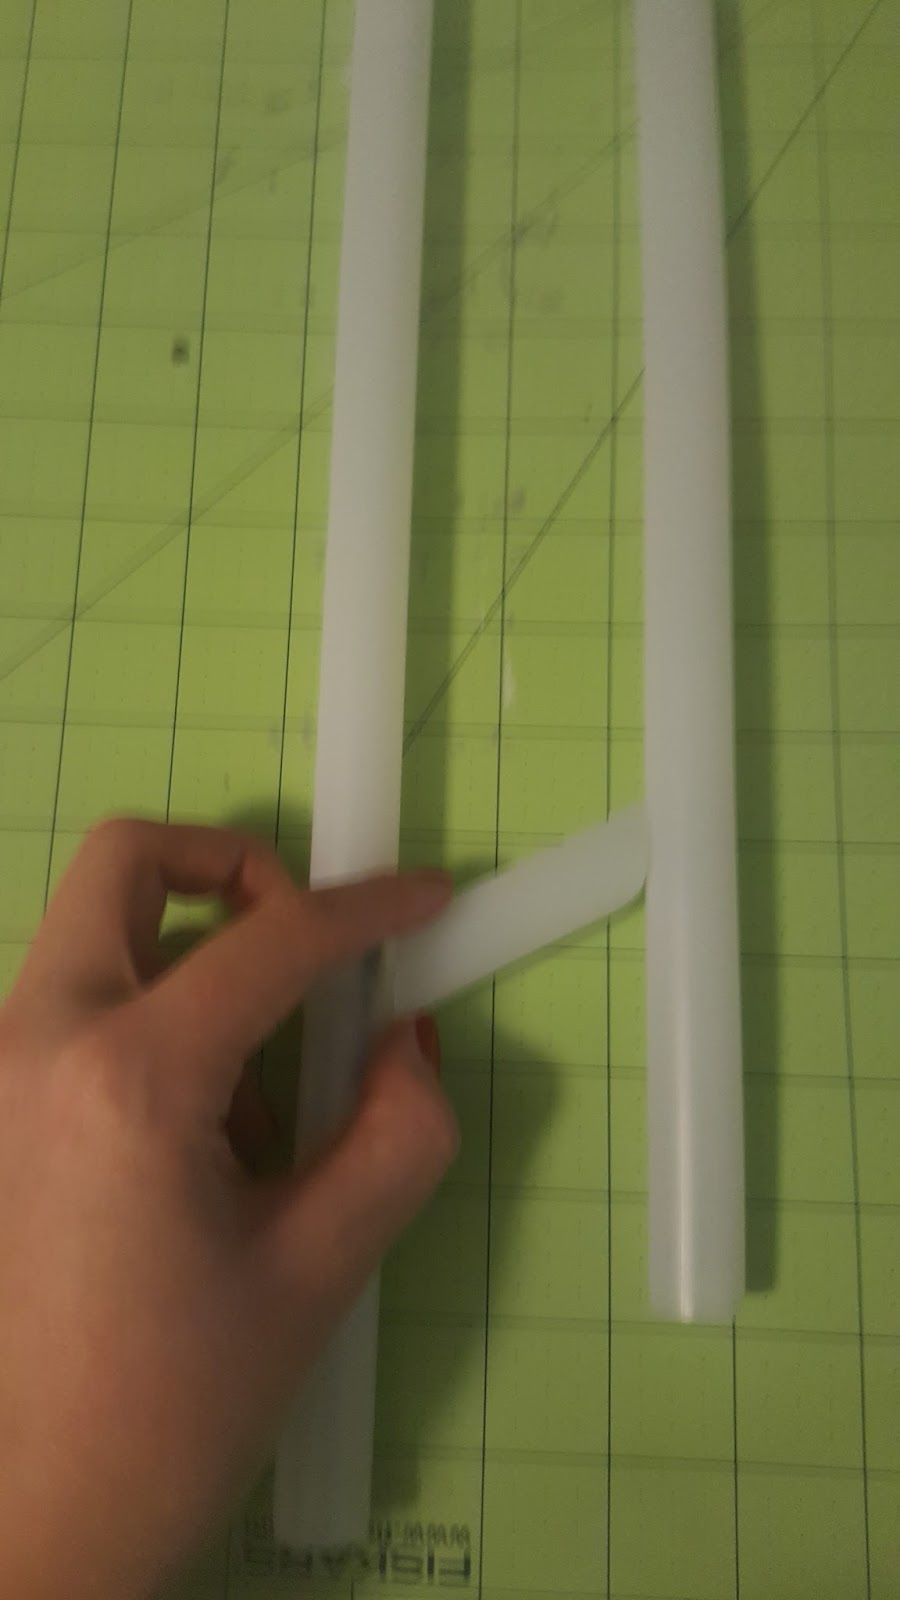


I tried a variety different methods in order to get the trident pieces to stay together. Hot glue, wires, etc. However, I found the best method was electrical tape. I am going to be covering the entire thing in worbla to make it sturdy, so the appearance doesn't really matter that much. 


The spikes lean a little wonky, but I was able to sort that out when I added the Worbla. I used my cutting mat for spacing.

I had an scrap piece of Worbla from when I made my Scarlet Witch head pieces, so I went ahead and used that. 


I made slits on the backside, so I could fold it over better.


There were still come gaps at the back, so I used scraps to fill it in. 


For adding the trident blades/spikes/top-whatevers, I notched the top edge of the tube in order to fold it down onto the blades/spikes/top-whatevers. 


I made a little template of the blades and then cut them out of my Worbla scraps. For each blade, I used two layers of Worbla in order to give it more thickness. 
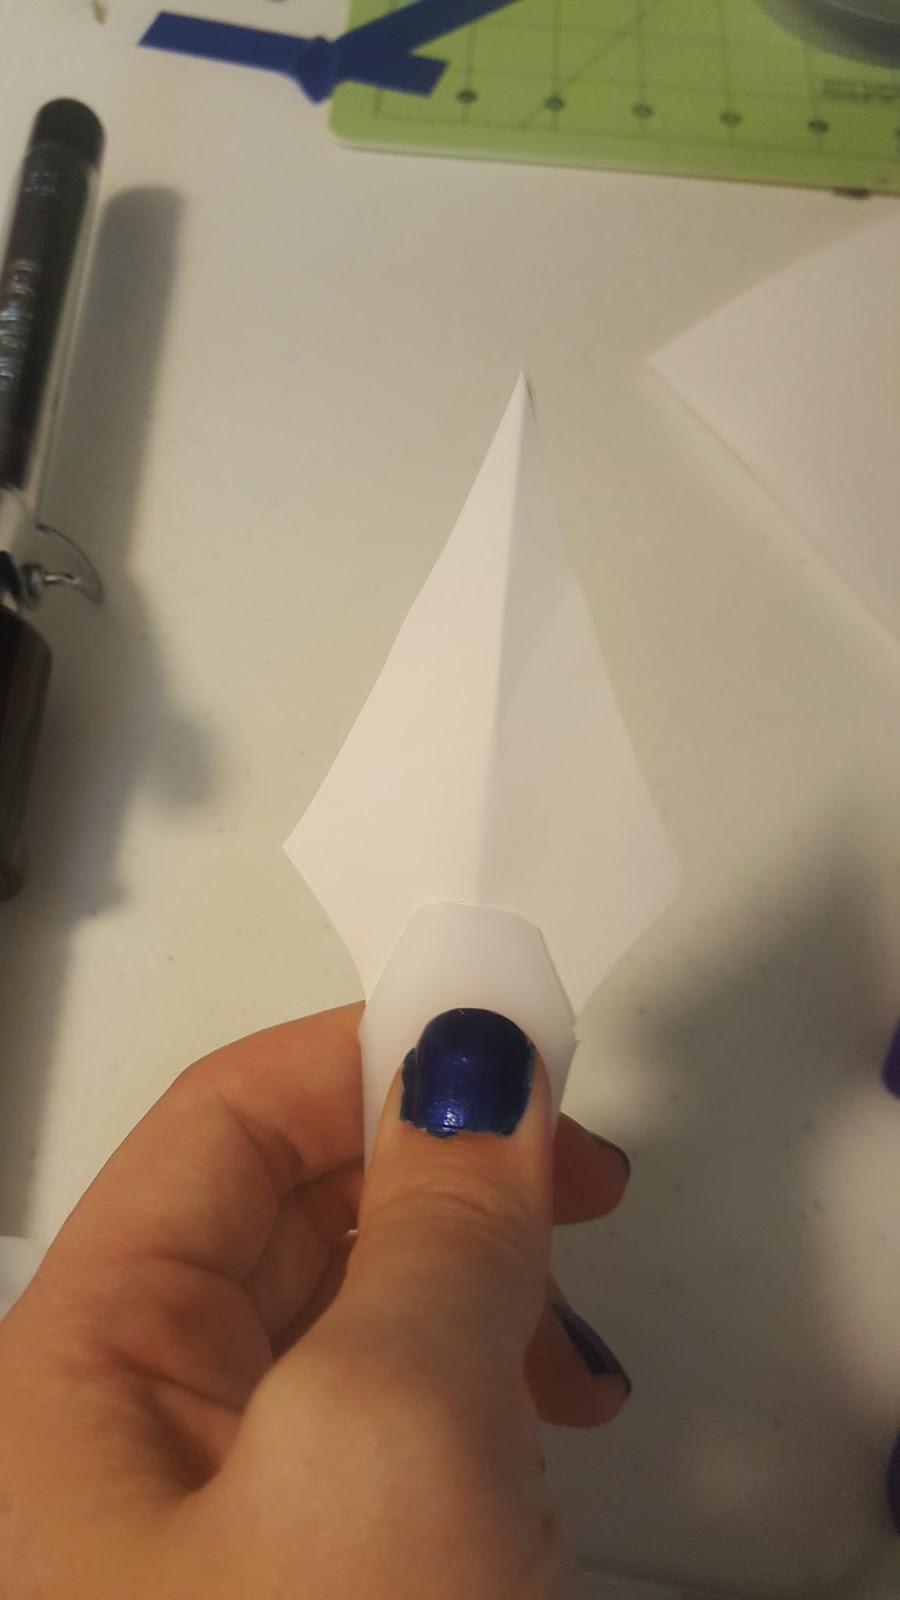


Then I added them to the top and used scraps to cover everything.


The right side blade is leaning a bit, but I can fix that later. 

Next, I made the outside blades. Same method as the other blades: paper cutout, Worbla cutout, two layers, and attach.


And here is my trident at the end of part 1. 


I am currently working on smoothing out all the edges, which looks like it will take a healthy amount of time. My next task for the trident (after smoothing) will be to add the bottom brace and attach it to the handle portion. Then it will be painting a finishing touches. I will update when I get working on that. If you have any questions, let me know. Thanks!


Saturday, July 2, 2016

Little Mermaid Gown Cosplay Progress: Part 2 - Design

Little Mermaid Gown Cosplay Progress: Part 2 - Design

While gathering ideas about the gown, I realized that this cosplay is going to to be a rather large endeavor. Luckily for me, I don't a specific event that I am intending to use it for so I don't have a deadline.

Pattern Selection

 For the base of the dress, I am plan on using the Simplicity 1728 pattern.

Simplicity Pattern 1728 Misses' Costume

I have decided to use a combination of A and B in order to best match the Ariel's Park Gown. I will be using A's larger puff sleeves and then adding B's lower sleeves in a sheer fabric. I will document any additional changes along the way as I make the gown.

Material Selection

I am going to use the following image of Ariel's Park Gown to plan out my fabric selection. I haven't purchased any of the fabric, so my actual selection might change during the construction phase. 


From my reference pictures, I have gathered that the bodice and arm puffs are the same materials. The rest of the arms are a sheer material of the same color. For the skirt, it is broken up into three layers. The bottom layer is a sequin/glitter blue aqua fabric. The middle layer is fairly sheer and allows most of the sparkle to shine through. The middle layer is very close in color to the bottom layer. The top layer is a slightly darker aqua fabric which is also sheer. 

I haven't purchased any of the fabric, but I will document which fabric I use in the rest of my tutorials.

I checked out the back of the pattern in order to get the predicted quantity of each fabric.
Because of the differece in my fabric choices vs those of the pattern, I am going to need different quantities for the fabrics. I will list the actually used amount in the documentation of construction. 

Seashell Brooch

I decided to make the seashell brooch instead of buying it as well. I plan on making it out of InstaMorph, polymer clay or resin.

And that is my initial design. I am moving in the next week, so I will be holding off on starting the project until I have completed the move.

Wednesday, June 15, 2016

Little Mermaid Gown Cosplay Progress: Part 1 - Inspiration

Little Mermaid Gown Cosplay Progress: Part 1 - Inspiration 

Recently my library hosted an "Under the Sea" Story Time. One of our staff members came dressed up as Ariel from the Little Mermaid and I instantly was jealous of her outfit.

Her outfit was based on one of Ariel's Park Gown from Disney.


This isn't her. This is a picture of the Face Character from Disney which I found on the Web.

This dress, although very beautiful, didn't exactly float my boat. However, the newest Ariel Park Gown is just what I want. 

New Park Gown:


Initially, I had planned on just buying the dress from another seamstress. However, I got persnickety about things and decided to break down and construct the whole thing myself. Now I have a new project!

Coming Soon: Part 2 - Design


Dark Sansa Stark Cosplay Progress: Part 9 - Completed Outfit

Dark Sansa Stark Cosplay Progress: Part 9 - Completed Outfit

Below are pictures from Con. Feel free to send me any comments. Thanks!


Bonus picture with the Mother of Dragons!


House of Black & White Arya Cosplay Breakdown

House of Black & White Arya Cosplay Breakdown

For an upcoming Con in Dallas, I have convinced my younger sister to join me in dressing up as the Stark sisters. I am doing my Dark Sansa outfit, and I am making her a quick Arya costume. I have chosen Arya's House of Black & White dress because of its simplicity. 


I am doing a quick breakdown of how I made the dress. Let me know if you have any questions.  

First, I made a really baggy dress. It doesn't need to be fitted in the slightest. I made it out of black linen.


I belted it so I could keep track of the waist for adding the bib portion. 

Next, I did a mini hem on the neckline. It doesn't need to be excellent. Just enough to keep the neck from fraying. 

Then I made the bib part.

To make the bib, I took a piece of the black linen and marked it into thirds. Then I sewed a small fold on each of the third lines. 


I next added the bib to the dress. And hemmed the end so that it hit above the belt.

For the sleeves, I cut a diagonal line a couple inches above my elbow and hemmed it.


And here is the final product!


On me:

Pictures of my sister in the outfit will be posted with my Sansa Stark final images.

Dark Sansa Stark Cosplay Progress: Part 8 - Underskirt & Finishings

Dark Sansa Stark Cosplay Progress: Part 8 - Underskirt & Finishings

For this part, I will be finishing up my outfit. I am going over the underskirt, feather arm cuffs, necklace, and dress finishings. 

Underskirt

Instead of doing Sansa's funky, stripy skirt that I saw in Entertainment Weekly (below), I decided to go with a simple underskirt. This was partially because I didn't know how to construct the skirt and partially because it seemed like it would take forever and it was pretty much going to be covered by the dress. 


So I followed a simple skirt pattern and used the same fabric from the dress. 


Feather Arm Cuffs

Because I didn't attach the feathers to my sleeves. I made feather arm cuffs. These were really simple.

First I made tubes of the black fabric from the dress/skirt.


Next, I cut them down to fit my wrists.


I sewed up the edges.


Then I measured out black double folded bias tape that was about half an inch shorter than the wrist cuffs.


Next I glued in feathers to the bias tape to make my own feather tape.


I attached the feather tapes to the cuffs.


Two layers of the feather tape took care of it all.


To keep it on my wrists, I attached press on velcro.

Necklace

For Sansa's circle necklace, I used black Worbla that I had left over from my Scarlet Witch headpiece. I got the Worbla from Arda. Unfortunately, they don't seem to have it anymore on their website. 

Here is my lovely kitty, Murph, on the uncut Worbla. It was about the size of your average poster board and cost about $20. 


If you already have Worbla for a project, this is a great option to use the scraps. If you don't have Worbla, I would not suggest that you go out and buy some specifically for the necklace. I used about a six inch square.I drew out the shape on some craft foam and used the sandwich method with the Worbla.


Yes, the pendant has glitter all over it. No, the Worbla is not glittery. I was using glitter for another project when I was making it and as we all know glitter gets everywhere.

For the chain, I used jump rings from Joann Fabrics. The particular ones that I used had a flexible center so they were easier to work with. They were intended to be used for chain mail. I used approximately 200 of these rings. 


For the nail at the end, I used a bullet charm from Hobby Lobby and covered it in extra Worbla.


For final touches, I coated the pendant in black paint. I wanted it to be a slightly darker shade of black. I used the paint below.


Dress Finishing

I attached a series of hooks along the front and I was all good to go.

I am going to post Con pictures for the final look.

Coming Soon: Part 9 - Finished Costume