Showing posts with label Poké Ball. Show all posts

Saturday, March 11, 2017

Poké Ball Pillow Take Two: 3D Version

Poké Ball Pillow Take Two: 3D Version

I wasn't 100% thrilled with how my original Poké Ball Pillow turned out, so I decided to make a 3D sphere version as well. 

I used my left over fabric from my original pillow to make it.

I used this pin for my pattern for the ball:  https://www.pinterest.com/pin/371335931745679896/ 

I tried to use the source, but the blog was protected. So what I did was used my snipping tool to get the image and then enlarged it in Word. You can make it whatever size you want. I make the total height about 8" for mine. 


There are a bunch of ball patterns online that you can try out as well.

Anyways, take your pattern and fold it in half. Mark the half way point.


Give yourself about a half inch hem allowance on your pattern piece then cut it in half.


Cut six pieces of red and six pieces of white flannel (or fleece if you choose). You can then partner up your white and red pieces. 


Pin the pieces togther along the center edge.


Give them a quick stitch and then flatten out the seam. 


To start making the ball, pin two of the pieces together along the edges and hem them together. 


Repeat three times. 


Next, connect the three pieces in a similar manner until you get a sphere. 


Leave a small gap near the equator line of your ball for your stuffing.


Turn the ball right side out and begin stuffing. 


Stuff stuff stuff with all the fluff fluff fluff.


It is okay if the stripes don't match exactly, because you will be going back to make the black band. 

When you are done stuffing the ball, hand sew it up.


Next, take a strip of black flannel (or fleece). I made mine approximately two inches wide pre-hemming (1-ish inch post-hemming). 

 I attached fusible interfacing to the back and then gave each side a small hem. 


The length of your strip will be based on the circumference of your ball. 


I then took fabric glue and glued it the black strip down around the middle of the ball. I made sure that the black strip covered up any imperfection on the center seam.


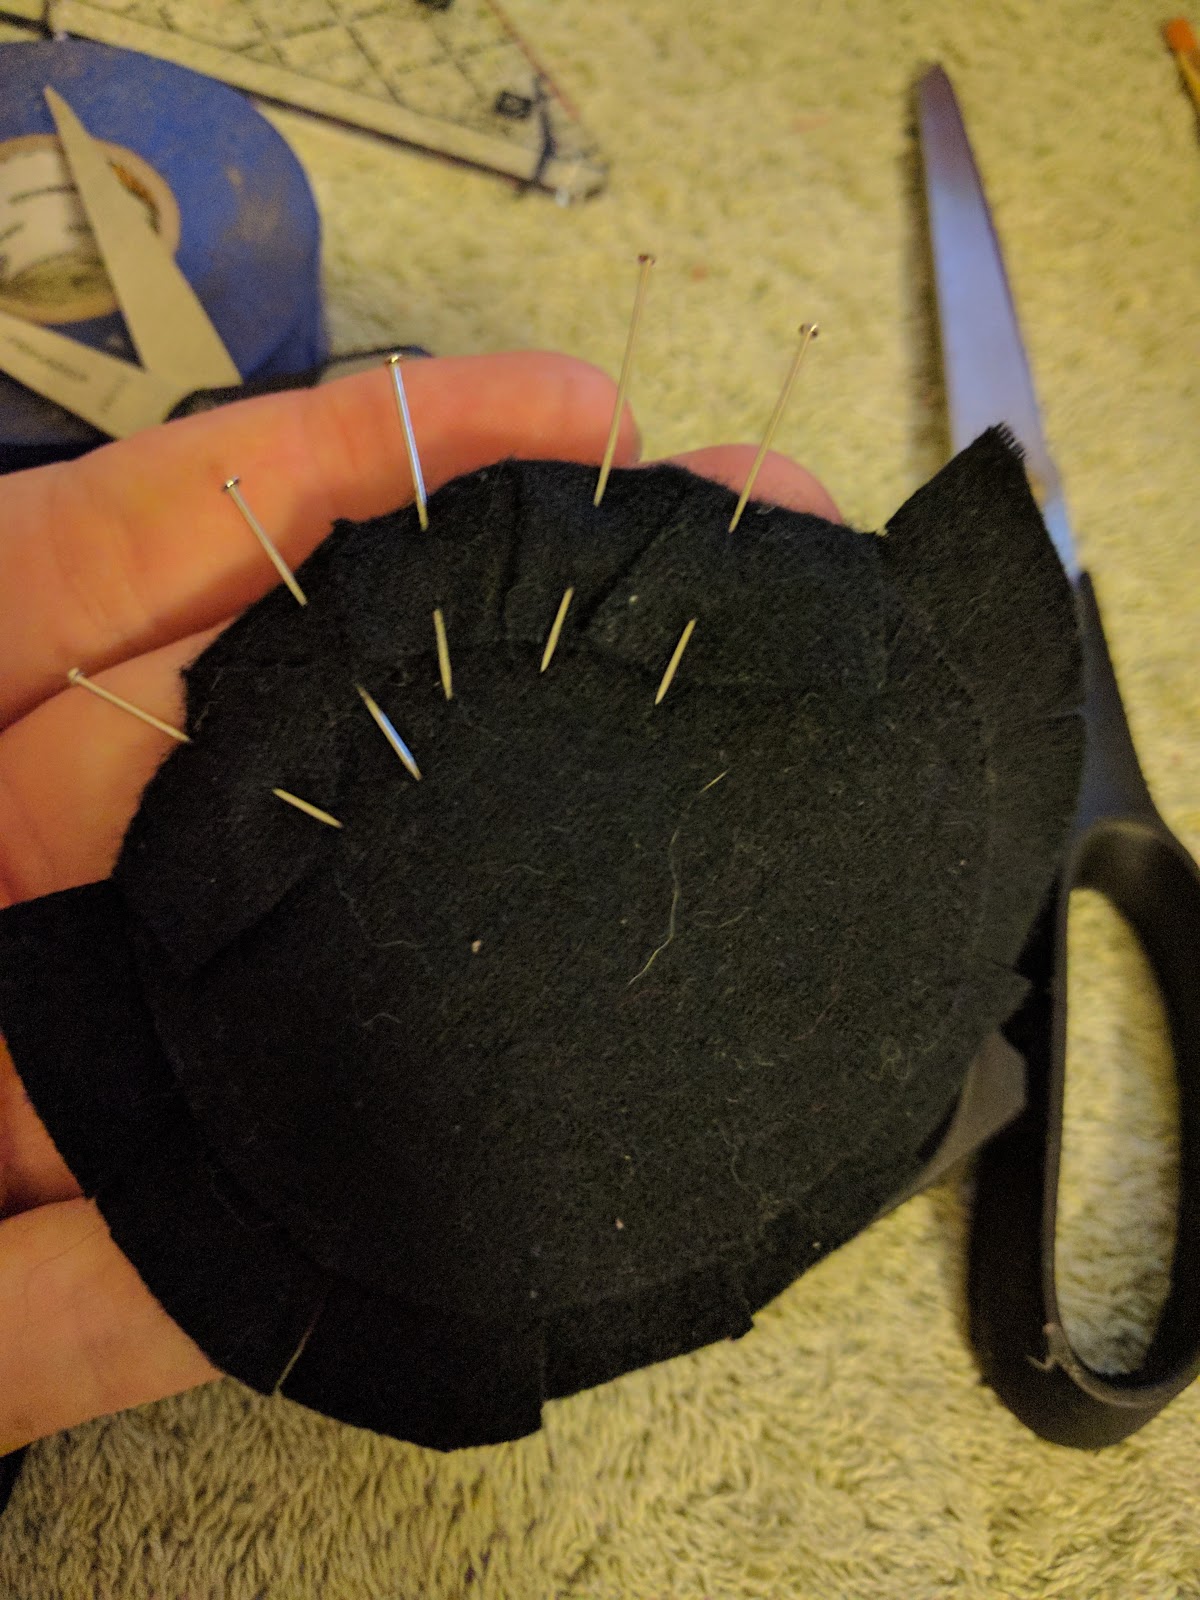
Next, I made the button. I cut a circle out of the black flannel and attached fusible interfacing. 


I then sniped the edges (using another circle as my reference) and pinned them down.


I gave myself a quick hem along the edges.


For the white center, I cut out a white circle of flannel and glued it onto the center.


Boom. Done. And in less than a hour.


Saturday, January 28, 2017

Fandomonium Prize Construction: Part Two - Poké Ball Pillow

Fandomonium Prize Construction: Part Two - Poké Ball Pillow


For Fandomonium, I was approved to make a Poké Ball Pillow, Wolverine Claws, and a Comic Book Themed Bag. I am going to go through how I made the pillow.


Supplies Needed

I used:

  • half of a yard of red and white flannel
  • quarter of a yard of black flannel
  • pillow fluff (Poly Fil)
  • fusible webbing (optional)
  • hem tape (optional)
  • black thread
  • scissors
  • iron
  • lint roller (my house is run by kitties)
  • paper and tape (for making a circle pattern)
  • ruler
  • pencil/sharpie


Process

First, I made my circle pattern. I made it with a 8.5" radius.


Next, I made circles on my red flannel.


When I cut it out, I gave myself approximately 1/2" of extra for the hem allowance.

I also divided the circle in half and marked it.


I repeated these steps for the white flannel.


Afterwards, I cut both the red and white circles in half.


I placed the red and white circles together and figured out the size of the black center strip.


I ended up cutting out two rectangles that measured 18" in length and 5 " in width.


I next hemmed the edges of the black rectangles so that the length post-hemming was 3.5".


Note: Make sure that your ends of the black rectangles match up. Otherwise they won't be the same when the two circle sides are sewn together.


After that, I sewed the black strips onto the center.


After the strips were sewn on, I used hem tape on the inside of the circles so that the excess fabric wouldn't get all screwy on the inside. This is not mandatory, but helps keep everything laying flat.


Now we have a completed side.


I made two of these. Again, make sure the black strips line up before you sew them down or the sides will be funky in the end.


Next, I moved onto the button. 

I used a plate to get the shape of the button. It measured 7.25" in diameter.


Then I cut that out of black flannel and hemmed the edge. It was a very narrow hem.


Then I cut out the white center. I used the fusible webbing to attach the white circle to the black circle. You can skip this and simply sew it to the black circle, but I wanted to make sure it stayed centered.


Next, I used a zig-zag stitch around the edges.


I did the same thing (fusible webbing then zig-zag stitch) to add the button to the front circle.


I sewed the two circles together with the wrong sides out, but left a small gap not sewed so that I could add in stuffing.

Afterward, I flipped the pillow inside out so that the right side of the pillow were facing out.


I went on to stuff the pillow with pillow filler and hand stitched the gap shut.

Final Result:


Hopefully you like it! For those interested in one (but don't want to make it), give me a shout at fangirlingoutcosplay@gmail.com or attend Alachua County Library's Fandomonium in April to win it yourself!

TTFN!